Siding an old House #7

Well my friends, we’re getting closer to wrapping the old girl in some shiny new cement siding with AZEK accessories. I put the first piece of siding on July 31st and I’ve worked at least 10 hours every day since on this project.

That’s how slow I am.

1 house front
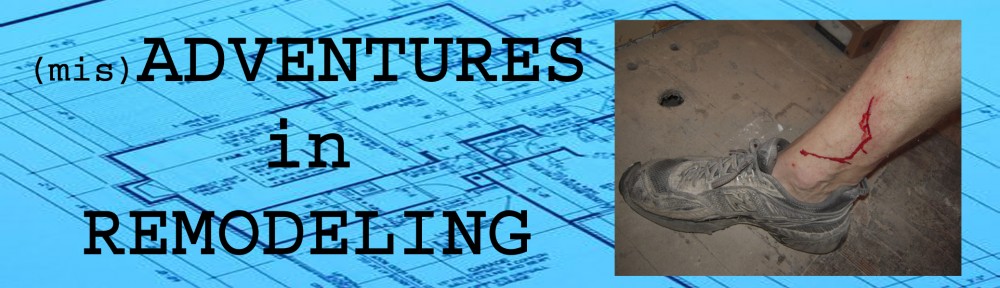
So now we’re working on the street side – where God and everybody passing by can see me fumbling and stumbling about. And I do stumble due to the metal plate in my ankle that makes me slightly wanting in the off road category.

2 siding paintedTo prepare for the final walls I went ahead and painted the rest of the siding – it’s more than I need – but there’s always the garage to be sided in a future project.

3 cornerThe front was quick to install as it has a big window – and it’s one story high.

4 sealing paintEven though the Hardie siding is factory primed, you have to coat every cut made. I would make the cuts, sand it down and coat the raw edge front and back.

5 1st floor scaffoldingFirst floor scaffolding ran the full length of the side of the house – about 35′

6 light boxesOnce up to the roof intersection trim pieces needed to be made to carry the trim around the eave light boxes up to the soffit overhang. The box has an LED down-light and a weatherproof electric receptacle.

7 trim piecesI love making doodads for trim pieces. Here is the front and back of the light box trim pieces. Stainless steel screws and PVC glue hold these AZEK pieces together.

8 trim installedThose pieces get installed around the light box to transition the trim to the soffits. The rabbet overlaps the siding.

9 2nd floor scaffoldingAnother level of scaffolding goes up. I’ve learned my lesson and make sure safety first. It takes time, but a lot less time (and money) than a hospital stay.

10 siding pieceThe problem is the Hardie siding is it’s 12 foot long and very brittle. I would make the cuts and prop it up against the scaffolding – run up the ladder and hope it was still there. I only lost one to the wind, so I can’t complain.

We’ll wrap up this outside project in the next post. Then we’ll go inside and get to work.


Siding an old house #5 Lights and trim

Progress! It is a steady march around the house, siding one wall at a time. Things are moving, mainly because the weather has cooperated with little rain for the past month.

1 patio sidingThe patio side is complete. AZEK trim was used along the soffit and removable trim pieces against the roofing.

2 light blockThe light blocks that I previously posted about have been wired and the mounting hubs bolted to the electrical boxes with stainless steel bolts. Copper flashing keeps everything dry.

3 patio lights 1I used these barn lights with 40″+ arms made by Hi-light in California.

4 patio lights 2I centered the lights over the three windows below.

5 patio lights nightA light test to see what 20w (100w replacement)  LED bulbs would do – it’s a pretty even light over the patio. The perimeter lights on the stone and corners  are 6w LED down lights.

6 base cap partsAll the trim is AZEK. Here I’ve fabricated some corner base caps and glued the corners with PVC glue held together with painters tape.

7 base cap gluedI got a little carried away and glued all the pieces together.

8 base cap repairThen I realized that I couldn’t get the trim pieces on the columns if all sides are glued. Fortunately I figured this out before the glue set completely.

9 base cap installedThe trim pieces create a base for the AZEK corner boards that are mounted above the water table trim at each corner of the building with siding.

10 siding templateSince I have several corners that have to have the siding fit precisely, I’ve made a Masonite template to trace onto the siding. It’s cut with the angle grinder with a diamond blade.

11 siding cap detailAs usual I have all cuts to fit within a 16th of an inch. This is before caulking.

12 siding sunroom startAnd on we go on to wall #3. The great thing about using Hardie siding is that it looks like the original wood.

Hang around – we’ll go inside sometime.

Siding an old house #2 Flashing

Wow, look at the time!

It’s been more than a month since I’ve posted on my little project here at the Misadventures. No I haven’t run out of steam or money – yet. It’s just when the weather is good you make the best of it and go, go go.

So we’re getting the outside done before the cold weather returns this year – that’s my story and I’m sticking to it. Let’s talk about flashing, shall we?

First – there is a big difference between caulking something and flashing something. In my opinion always flash if you can – and throw a little caulk in there for good measure.

So here’s some flashing.

1 copper flashingNow like everything else I’ve gone overboard. These are copper head flashing that go over all the exposed windows. I had them fabricated from 16 ounce copper and soldered end caps. Typically an aluminum angle flashing is all you need.

2 flashing over windowsAll the windows that are exposed to rain get these. The top windows on the second floor won’t need the flashing because they are covered by the roof overhang.

3 copper nailsSo we grab a handful of copper nails – regular steel nails won’t work as they’ll react to the copper.

4 flashing nailedThe housewrap is cut to make a flap above the window so that the flashing will nail directly to the sheathing.

5 flashing tapedA piece of self adhesive flashing tape  is then placed over the copper and sheathing. Make sure the tape is compatible with copper.

6 flashing doneThe flap of  housewrap is taped over this. I’ll add felt and rainscreen over this before the siding is installed.

7 wall penetrationsAll of the wall penetrations also get their own little copper flashing. These are done a little differently because the rainscreen (the green stuff) has to be installed 1st.

8 light blockFor example this light block for a patio light. The block is made from 5/4 (1″) thick Azek surrounding a 4″ octagonal electrical box placed on point so the light fixture will mount correctly. The block sits on top of the rainscreen.

9 light blockFirst cut a section of the rain screen out above the block and cut a flap through the felt and housewrap.

10 light blockThese small flashings were made from strips of copper I cut and bent, tucking the sides in – not as fancy as the soldered window flashings, but they’ll work fine.

11 light blockFlashing is attached with copper nails.

12 light blockFlashing tape over that –

13 light blockThe flap comes down and the rainscreen is replaced and taped. The siding will be the next and final layer.

I know this was pretty boring unless you woke up in the middle of the night wondering how you were going to flash that wall penetration –

Well, now you know.

Oh, and one more thing -Some pretty things are getting done around this place – here’s a peek at the master shower under construction.

14 showerHang in there we’ll get this place finished one day…


Siding an old house #1 Water Table Trim

Well, what can I say – it’s been awhile since updating the goings-on at the Misadventures project. Oh, there’s lots of activity – it’s just that it’s not so photogenic.I put in a full day every day – but it’s pretty lame stuff pictorially.

Since the weather has been decent, I’ve started the siding project. But before we slap up some Hardie cement siding, we have to get the Water Table trim on.  This is a traditional trim detail at the bottom of the building and acts as a skirt board band to separate the siding from the foundation. My house never had this originally – and I haven’t seen one house around here that has it – but what the heck let’s put some on.

Let’s get started, shall we?

1 stone flashingWe’ll tackle the hard part first. Pictured above is the first step. A flashing membrane is added to the top of the stone to prevent water from going behind the stone and lath and freezing. Behind the stone is the MTI rainscreen which is applied over 30 pound asphalt builders felt which is over the weather resistive house wrap. The rain screen has weeps in the lower part of the stone to let the moisture escape. The siding will also have a rain screen that ties into this weep system. Makes sense? Even I’m confused.

2 treated wood nailerOnce the flashing is installed the kiln dried pressure treated nailer goes on. This is a combination of a 2X4 and 1X4 – use kiln dried pressure treated lumber if you want a straight and stable base to fasten your Azek trim.

3 change anglesOf course, nothing at the Misadventures goes that smoothly. So after I installed all of the nailers I took them all off again. Why? Because I only beveled the top 5 degrees instead of 12. Five degrees is just not enough to effectively shed water. You can see the difference of 5 vs. 12 above. After reinstalling, spray foam was added to the gap underneath between the wood and flashing and cut flush to the wood face.

4 water table startOnce the nailers were on the Azek band board and angled top were added.

5 water table patioThis was also added to the stone band that runs the width of the patio. This is recessed into the wall, so the trim is much narrower.

6 wood flashingTo prep the old portion of the house that only gets siding – the lower three feet of the house wrap was removed to wrap flexible flashing over the metal cap at the bottom of the 1/2″ CDX plywood that overlaid the original lap siding. This is to keep water from entering between the plywood and metal.

7 building feltNew housewrap was installed and a layer of 30 pound builder’s felt was added. Typically you won’t need this – but remember the house wrap is pretty old. It’s exposure rate is about 3 months maximum, not three years. So I added the felt just to make sure things keep dry.

8 green guard drainageOver the felt goes the Green Guard rainscreen. This allows the wall to drain any moisture that may rot the wall sheathing over time. This is attached with 1 1/2″ plastic cap nails.

9 new building wrapAnd we do the same thing around the bottom of the old house. See that I previously put the new underground electric box on a Azek base so that the siding will butt up against this, making a clean transition.

10 jigThe Azek trim is routed with a channel that fits around the metal lip with flashing. This allows the moisture a path out of the building. Since Azek is 18 feel long, putting this floppy stuff up by myself is a challenge. I made this handy Azek -holder-upper using an old floor jack.

11 water table cornerGoing around the corner it goes over the rainscreen. An angled cap goes on top of this – and then the corner boards will be added. So, not very interesting unless you’re doing the same thing – which you probably aren’t.

Stay tuned – it’s gotta get better than this.


Mortises, problems and other stuff

I’ve got lots going on here at Misadventures. Finishing up soffits and Azek trim on the stone work. Rough plumbing is in the woman cave. New roof goes on next week.

Today I’ll do a quick post about original doors and mortises.

I’m using the original doors in their original locations when possible. Really, there’s only five doors on the first floor that stay where they were 80 years ago, but the original mortise latches and locks were broken and others didn’t work very well. So, to make it more complicated I got new latches and hinges for the doors.

1 new mortise locksThe problem is the new latches won’t fit the original openings. Great! Time to make a jig!

2 mortise jigSo using the handy router bit to base plate edge  blocks,  I made a jig to route the new openings in the doors. Since I have five of these to do it was quicker to make a jig.

3 mortise routerThe jig is aligned to the opening and clamped to the door. The router base follows the frame to cut the new opening.

4 mortise fitAnd the new latch fits into the new recessed opening.

5 strike plate jigOf course, the strike plates didn’t fit either, so another jig is made for the door jamb. The router follows the inside frame and you have just what you need.

1 door finishedThe reconditioned door with new latch, door plates, knobs and hinges – one down, four to go.

2 stone trimWhen it’s not raining I’ll jump outside to finish the Azek frieze trim and soffits. This was the last of the hidden vent soffits around the whole house. No more birds nesting in there!

3 copper lightAnd while I was at it, I added this nifty solid copper light over the back door. This should get a nice patina over time.

6 sill pan leakOne problem that had me stumped was this little leak at the sunroom door. There’s no gutters on the house yet, but no leaks should be happening here.It has a sill pan underneath.

7 sill panAs you can see from this photo in 2012, the sill is protected with a pan and flashing underneath. After taking the brick-mold off outside and my newly installed trim off the inside, I was ready to remove the door and see what could be the problem.

8 sill pan fixBut before I dropped the door, I thought I would see if it was possible that the pan was leaking. These sill pans are made from three pieces that are cemented together, so I took a syringe and filled the pan with water. It leaked. So I ordered a can of Weldon 2007 – a water thin pvc solvent. I used the syringe to add cement at the seam inside the pan and then applied upward pressure with the putty knife between the floor and pan. It took care of the leak.

Wish I would have thought of this before I took off all the trim. Live and learn.


Azek Trim #3 The Difficult Project

So far, so good- we were able to get some of the tall stuff done – like the pointy front of the house. It was pretty easy because it was only one section of scaffolding two units high. And we’ve been able to get the fascia and soffit wrapped around the sunroom without incident.

Now we go for a bigger project – the sides of the house. We’ll do the tricky side first.  The 1st problem is scaffolding.  It takes a little longer for a 60 year old who still walks like a penguin from last year’s experiment with gravity to get things in order.

1 scaffold set upThis is set up #2. I put it up once, but could only get two sections wide – so down it came and this configuration went up. That took about 2 1/2 hours of my life. I’ve got the center and right hand fascia in place, temporarily fastened with cortex screws.

2 eave panelThe 2nd problem is the main roof dives into the sunroom roof. I made a panel of
Azek that rests slightly above the roof surface. The panel is removable when the sunroom needs to be re-roofed. Black roof caulking covers the small gap between the Azek and roof surface to keep any water or insects from getting in.

3 soffit instalI’m using Quality Edge TruVent  hidden vent aluminum soffit. It has no visible holes and looks more like the original type of soffit that was on this home.

4 eave problemProblem #3 is because there was no plan when I started building this place. The siding and trim detail are going to be a problem here.

5 eave problem closeupHere’s a close-up of the problem. We’ll have frieze trim below the soffit and we’ll have another trim piece right above the mudroom roof surface. If we leave it as is, it will have tiny pieces of siding on the wall here.

6 eave side panelSo my solution is to make an Azek panel to span this roof area under the eave. I made a plywood template to make sure I got all of the angles right. The original roof is a 7/12 and the mudroom roof is a 6/12, so this panel had to taper to fit the odd angles. Also the upright elements had to be plumb when in place to make everything look like it’s supposed to.

7 fascia damageI used the original fascias on most of the house as backer for the new Azek trim – but this piece had to be replaced – as did all of the original fascia on the patio side of the house.

8 panel installI fastened the panel in place with removable cortex screws. The panel then had to be wrapped around the corner with more trim pieces to meet the eave soffits. I’ll detail that in another post.

9 eave side panel other viewLooking from the other way, the side panel ends at the roof ridge. This will allow the siding to terminate here instead of having those tiny pieces under the eave.

10 fascia installationNow to put the other 15′ fascia board up. Working alone has it’s challenges, but the good thing is you can go as slow as you want.

Hang in there fearless renovators – we’ll get through this together – even if I’m doing all the work.

Exterior Azek Trim #2

The winter winds are moving in and I’m not ready. But we will carry on, as I gotta get the siding up – hopefully this year. It would go quicker if I would quit making up fancy do-dads for the exterior trim.

For instance

1 fasciaI started by getting some fascia wrapped around the sunroom. When the roof was put on I used a spacer to make sure I could get the Azek trim under the gutter apron. That’s a nice, normal trim detail.

2 old house eave repairNow it gets more difficult. There are discussions all over the web about ‘pork chop’ or ‘mutton chop’ eave returns. That’s the blocked out ends of the eaves that almost every new home has, but most don’t like. This house had them originally – but then this was a low budget house when built.

3eave electricalSo my solution is to make a semi-recessed return.  I’ve never seen it done, but why would that stop me? These are on the old part of the house. The roof overhang is 16″,  which made these guys pretty big. I made them like cabinet panels using 3/4 trim stock for the frames and 1/2″ sheet stock for the insert.

4 eave boxI used super blue remodel boxes in a couple of locations. 110v power to the left and a cat5e cable to the right with an approved electrical divider in between. Just in case I want to add a Pan,Tilt & Zoom security camera later. Just planning ahead.

5 eave box finishedA weather proof cover keeps everything dry. The original fascia boards are in really good shape, being covered with aluminum for many decades. We’ll scrape them and use them as the backing for the new Azek 1X10 trim stock.

6 down lightsI used these fixtures for the down lights. They are available on Amazon – a pair costs less than 20.00. I used these because of the small junction boxes on top. They come with a 50w halogen bulb which I replaced with a 6.2w LED to reduce the heat. I used 10 of them and it lights up the whole perimeter of the house – using only 62 watts.

7 sunroom eavesThe sunroom side has eaves at about 11″, so they are a little smaller. Here you can see how I integrated the light box panel to the hidden vent soffit detail.

8 sunroom eave boxHere’s the back of that same box. You can see the recess back from the fascia – so this will take a little fancy cut work to trim out.

9 table sawThat’s why we drag out the 10″ table saw with a built in Triton router. We’ve got some fancy cuttin’ to do…

10 trim piecesDang, that’s the trim pieces that go around each of those light box/eave return things. Looks like the Azek dust will be flying – glad I’m doing this outside.

Stay tuned …

Exterior Azek Trim #1

So the stone is finally up and now the ball is fully back in my court – so we better get busy!

1 trim instalWe left off here. The puzzle piece detailed in the last post goes here. You see the little wood pieces on the left side of the eaves – that’s to hold the trim boards as I put them up by myself.

2 detail right sideI’ve recessed the ‘porkchop’ – that’s what they call that triangular thing that is used to terminate the eaves as it intersects a gable. This house had a big boxed one even with the fascia, so recessing this panel back behind the wall face makes it much less noticeable. Also note that I used a cabinet style panel when the flat area in the eaves seemed too large.

3 detail left sideI also made a gable decoration that’s made of flat stock Azek. I wanted a little detail up there. The under eave material is Azek bead board run parallel to the fascia and frieze board trim.

7 gable decorationThe Azek trim is pvc, so it’s perfect up against stone. I prepainted it with two coats of BM White Heron soft gloss before I put up the trim. It’s attached with cortex screws and stainless steel 16ga finish nails.

4 right side eaveThe eave will get a soffit panel for a switched electric circuit and LED down-lighting.

5 panel apartThe panels are made just like cabinet doors out of Azek. The frame is made from 3/4 stock and the insert is 1/2 sheet stock. Pocket screws and pvc glue are used to keep it together.

6 panel togetherPut some pvc glue and 7/8″ nails in the panel and it’s ready to install. Cut the holes where needed in the panel first.

8 eave electricalI used these IN Box by Arlington electrical boxes to run under eave electric. Oh, you can use 14ga wire for the lights, but I ran 12ga almost everywhere.

10 eave finishedThe open sections will get hidden vent aluminum soffits. I’ll put 10 LED down lights around the house.

11 trim completeSo the old girl is starting to go back together. More stuff added next time – at least we’re going in the right direction.


Veneer Stone #5 Finishing Up

Winter is closing in pretty quickly and I better get a move on some things if I want to have the siding up this year.

1 Wall WeepsThe stone belting goes from the front entrance to the stone mudroom – here are the rain screen weeps before their haircut.

2 Weeps GoneAnd after – they’re pretty much invisible, but will let any water out of the wall system.

3 patio repairThis part of the patio had to be repaired because water got under the slab and froze and dislodged the bricks – if you see that white strip to the left by the steps – that’s to space the stone to allow for some freeze movement to keep from damaging the masonry.

4 limestone patio stepsLimestone steps were used because they’ll age fairly quickly – and I want this place to look as though it was build years ago.

5 herringbone sidewalkI had the mason duplicate the herringbone pattern in the winding front sidewalk. Kinda Cottagy, don’t you think?

6 stone sawHe would do it on one condition – that I cut all the pieces to fit the complicated sidewalk. Here you see his 12″ brick saw that I became fast friends with over the course of this project.

7 azek spacerI had to use spacers under a lot of the brick work. I found strips of Azek worked best. It didn’t swell with water like plywood does and it is easy to remove after the mortar sets. Just drive in a screw –

8 azek spacer removealAnd it pops out will little effort.

9 trim puzzleNow it’s time to make things complicated. Here’s the first of many little trim projects. Made from Azek, the whole exterior trim is made from this stuff.

10 trim togetherSo pop the puzzle together with some PVC glue and stainless nails and it looks like this.

11 trim startAnd that little time waster will go right where the red arrow is pointing. Why? Because I gotta make it complicated. It’s a hobby, remember?

Fascias, Friezes and soffits are in my future – I just know it.