I know this is a long drawn out series – but there’s more components than average to this build, due to the flanking bookcases.
 The tops of the bookcases are slightly sloped intentionally – and because of this the side panel will need to be tapered. First a level is placed on top and the gap is measured for the taper. This is how much we will remove from the bottom to make the top level.
 I use a tapering jig, but you can use a homemade version just as well. This will add a slight taper to our side pieces.
 Once we have the pieces cut we then need to square the sides to the window casing. I used a framing square and shim out the side piece so everything is now square.
 A piece is cut for the side top reveal.
 An additional piece is cut to wrap around the front of the marble top. It is then painted before attaching.
 Now we’re ready to make the mantle. This is a 5/4 (1″) X 10 clear white pine board. I just set it up to get an idea of the overhang.
 I decided to make a back-band to go at the back of the mantle. I used a router to add some detail to the top and then cut the three pieces. Here I’m test fitting the cuts.
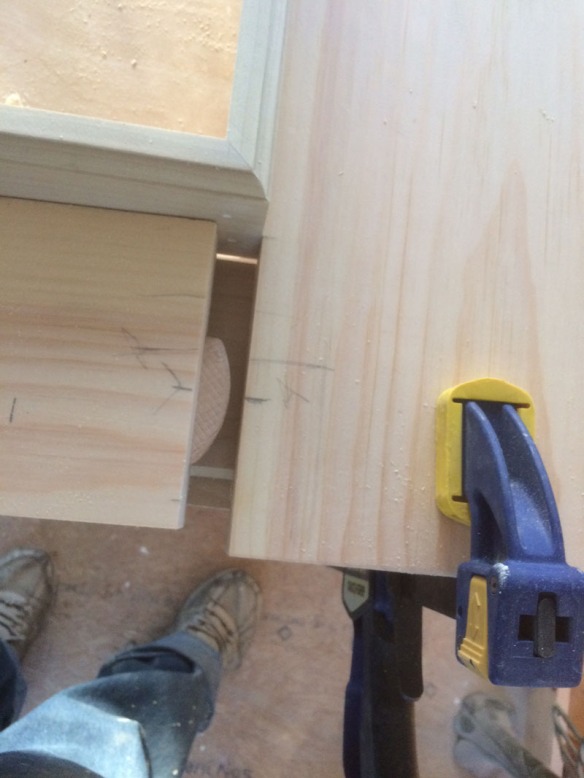
 The three back-band pieces are glued and nailed together, I then joined the front mantle to the side pieces with a biscuit and glue.
 The mantle and back band were all assembled as a one piece unit to keep everything flat and straight.
 Then the assembled mantle was test fit into place.
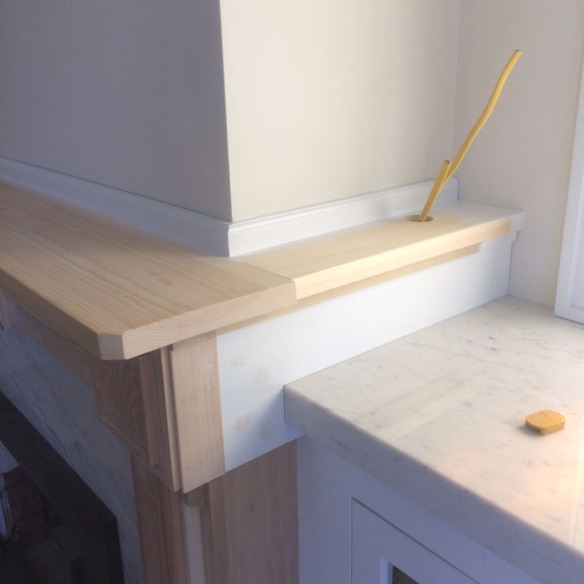
 The back band is finished and a hole was drilled in each side leg of the mantle. I made the side mantle top slightly narrower to make the joint easier to finish and not have to be concerned about the joint separating.
 Wiring from a wall switch is run under the mantle to both sides of the fireplace for the final test fit.
 The wires were for these. Called Sillites, they will allow us to plug in Christmas lights or other decorations on the mantle.
 Once the wiring is run we can finally glue and attach the mantle.
 Time to start sanding and finishing.
 One more detail is added to the side of pilaster to mirror the design in the sunroom.The paint is BM Ice White in Impervo enamel.
 I’ll sand and paint this a total of four times. I start will 100 grit and finish with 400. It is tedious, but when it’s finally done you can feel the difference.
 The Sillites have a cover when not in use.
 So you think we’d be done – but nooooo – we still have to finish the original details on the bookcases – and slide the fireplace in there.
One more post on this thing and I’m outa here – promise.

You really do great work! I’d be really dangerous if I had your skills.
Thanks Kelleylynne! One day I’m gonna get something completely finished – maybe in 2017
It’s so hard. LOL
I love the details and that you remembered to add an outlet for decor or lamps on the mantle. Electricians used to think I was crazy insisting on that.
Hi Laura –
Yes, I put them towards the back on each side. One of my real jobs is being a corporate display designer and I hate running power cords all over the place. Crazy too.
Amazing detail! Looks so classic, like it came with the house.
Thanks so much D’Arcy! Well, I was afraid it was a little too much, but what the heck, I’ll only do this one time.
My parents have an outlet in their mantle. Just a regular one in the center but the builders mortised it in so the plate sits flush. They’ve never used it.
Hey Chad – I know what you mean about the receptacle in the center. Now you can’t use regular outlets like the ones in the wall – they have to have a shutter that closes off the holes – this is to keep you from being electrocuted when you spill a beer while dancing on the mantle.
We were just talking about this again today. The mantle outlet is now dead because an outlet in my bedroom/my dad’s office is on the same circuit, and my dad wanted to reinforce the ceiling to hang the bookshelves from it, so he went up to the attic and cut out the floor with a circular saw, and found that some dumb dumb later added flooring that sat right on the wire. So now my dad might need to put in 2 boxes with a short length of wire between them to deal with a splice if he can’t feed the wire up.
But back to the mantle outlet, my mom puts fresh greens on the mantle in oasis sitting in shallow dishes, and then she waters them. What do you think? Plastic covers of some kind? Or a brass floor outlet cover with hinged things? Or just put the circuit on a GFCI so Mommy doesn’t get zapped if the greens overflow? They won’t want to rip the mantle apart to retrofit it with a specialty receptacle.
Hey Chad! It’s always something. If it’s a standard electrical receptacle on the mantle, I just pop it out and stick a GFCI there. That way when mom gets carried away with the watering she’ll live another day
We’re thinking of putting the gfci upstairs so the little green light doesn’t show under the clock
Yep that’s doable too.
As long as that outlet turns out to be upstream of it after all. We THINK 1951 wiring is pretty normal
Or you can just put one in the breaker box. All the GFCI’s at my house or at the breaker box. It may be a little more inconvenient, but the whole circuits covered
True but we think my dad has extra receptacles in his hoard, which is currently in my basement, which means no money spent vs 20 dollars.
Curt, I just finish throwing all my tools in trash, when’s the soonest you can come out!? Great work man, as always. I love the hidden outlets, nice touch.
Alex, you are too kind. Get them tools out of the can, man! This is not difficult. It’s a table saw, a router and some store bought carvings. Sure I’m OCD, but I’m no Norm from This Old House. But thanks anyways.
Wow what a lot of work, but it looks gorgeous!
Hi Jessica – work is stuff you don’t like to do – this is more like play for me. Just ask my wife – she thinks I’m crazy.
Nicely done!
Thanks Dan!
Really fantastic workmanship!
Thanks so much Kristin! Now if I could only take a good photograph…
i can’t wait to see this decorated for Christmas! It is already beautiful! Way to think ahead on the outlets for christmas lights, perfection. – Kristin
Hi Kristin! You notice I used stained glass windows – because I could never get them as clean as yours 🙂
It’s looking stunning.
Thanks Jacqui! Sorry I missed this note earlier. I haven’t posted in almost 2 months because I’ve been so busy with work, but I’ll be back to finish in 2017. Thanks for always stopping by and commenting – it means a lot. Happy New Year!